D&D Solo Adventures
The Abandoned Mine - Main Tunnel Entrance
Last action taken
You have twarted the orc guards at the entrance of the mine, and are moving further inside.
Room Layout
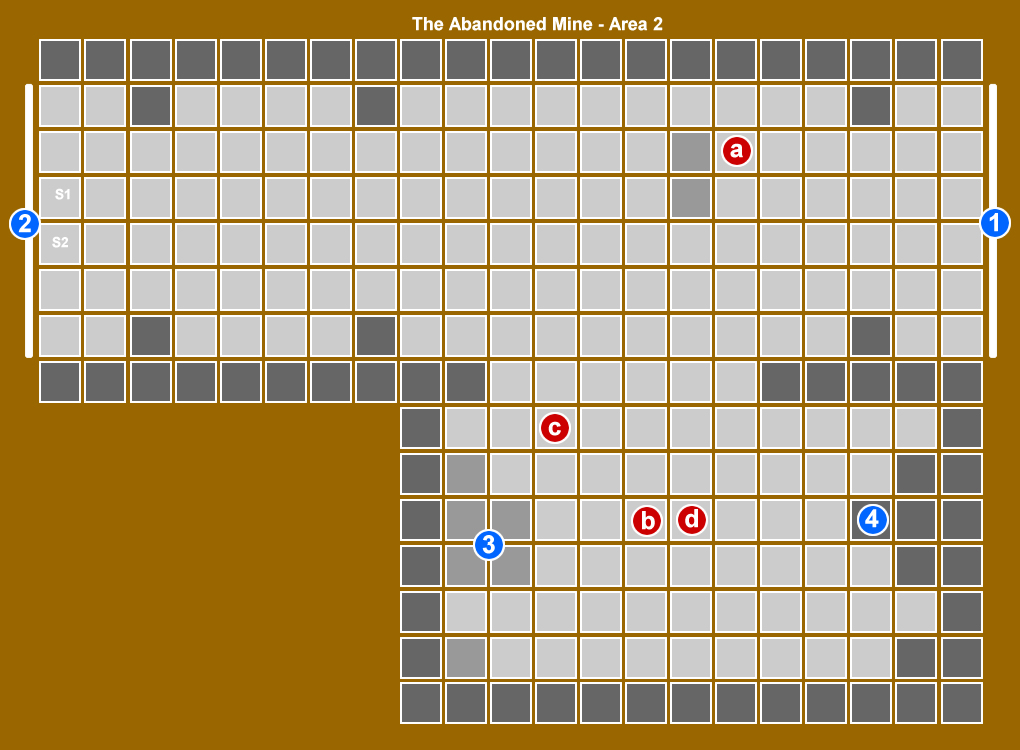
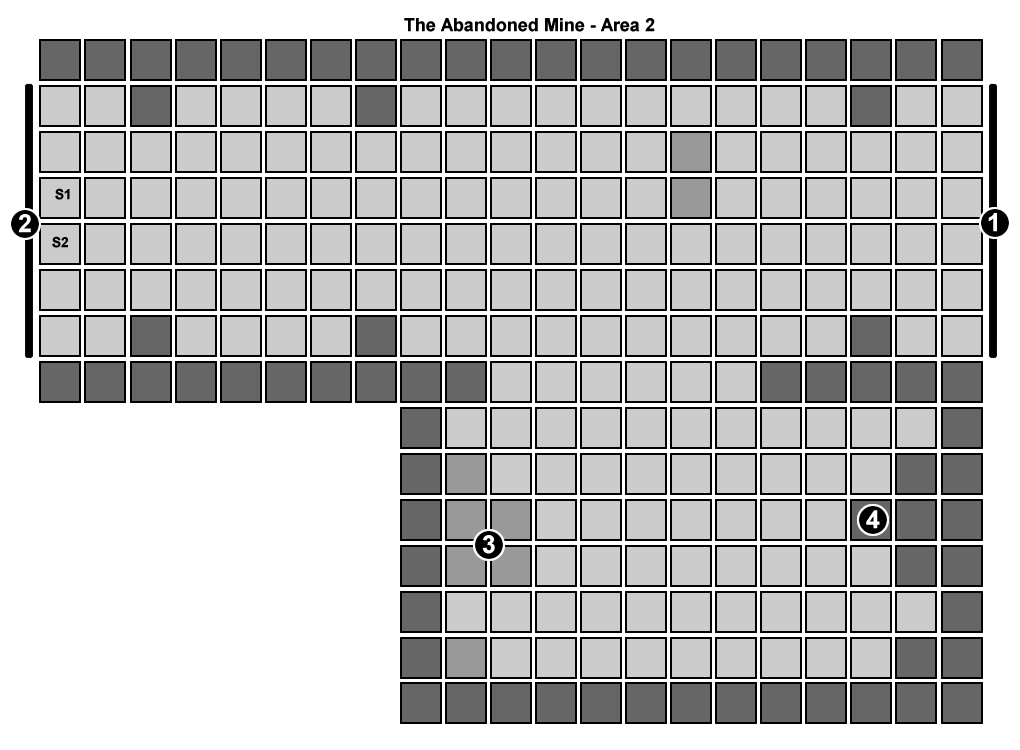
![]() Download: The Abandoned Mine - Area 2 Map
Download: The Abandoned Mine - Area 2 Map
Room Description
You are now standing inside the opening of the mine. The tunnel stretches forward into the distance. This section of the mine is lit with torchs up the left hand side of the tunnel. The air in the mine is very still, damp, and has a faint smell of smoke. The ground is rocky and uneven underfoot. An orc standing behind wooden barrels spots you and quickly ducks down behind the barrels, shouting to the other guards for backup.
Encounter!
Enemies
a) Orc Raider (mm 4e - pg 203)
b) Orc Drudge (mm 4e - pg 203)
c) Orc Berserker (mm 4e - pg 203)
d) Orc Drudge (mm 4e - pg 203)
Tactics
The supporting sleepers up both sides of the tunnel provide cover to PC's. Enemies that can't shoot ranged will charge at the PC's.
After Combat
Search the bodies: 
Explore
Objects
1) East futher into Stonebreak Mine
2) West exiting Stonebreak Mine
3) A pile of old crates
4) A cave in
Choose a root action:
1) Proceed deeper into Stonebreak Mine
2) Exit to Stonebreak Mine Entrance
3) Examine Object(3)
a)
i) Search for trap on object(3)  (Roll Dice)
Result
(Roll Dice)
Result 

ii) Disable trap on object(3)  (Roll Dice)
Result
(Roll Dice)
Result
b) Unlock object(3)
(Roll Dice)
Result
c) Bash object(3)  (Roll Dice)
Result
(Roll Dice)
Result
d) Open Crate Lid A) B)